Using TP-LINK HS110 smart plug for a Simple Energy Monitoring System
Hi Friends,
I hope my previous blog for making a low cost open smart home using openhab for beginners would have helped you all to begin your first smart home project with minimum investments,pls check it here if you have missed it
http://avenkat-iot.blogspot.com/2017/01/making-simple-open-smart-home-using.html
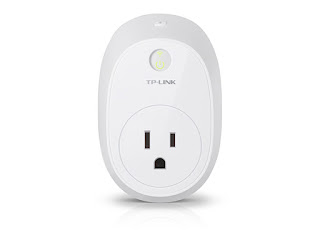
Today, In this blog I am going to show you how to develop a Simple but effective energy monitoring system(EMS) using a TP-LINK HS110 smart plug because TP-LINK brand has provided open API for their developers.So lets start developing our simple EMS..........:)
This project can be implemented in both your windows PC and even your cool Raspberry Pi.Here I have developed this system from my window's PC and you can also implement the same system in your raspberry pi too.
To begin this product, you need to buy a TP LINK HS110 smart plug which is available in the market at a price of $60(SGD).Presently this model is not available in India, but you can order online and can use it with a converter.
Windows Platform(PC):
To begin our project, we should install Node.js in our PC first. Node.js is a modern Client-server Scripting language which is being widely used nowadays for developing several Internet of Things(IoT) applications.You can download and install Node.js in your windows PC or laptop from this website https://nodejs.org/en/download/
Following this we have to download the available API for our smart plug from Github. Click the below link and https://github.com/plasticrake/hs100-api , keep the HS110 API in htdocs folder of your PC(I have assumed that you have XAMPP(Apache and MySQL database) installed in your PC, If you didn't please click this link to download and install XAMPP https://www.apachefriends.org/download.html in your PC/laptop and follow the installation procedure to finish installation. Just run any php file from your localhost, to ensure XAMPP has been installed properly. Now we are all set to go for our EMS development process.
Initial Setup with KASA app:
Kasa is the application provided by TP LINK for this smart plug, which you can install in your android/ios mobile phones from play store/app store to setup your smart plug with your wifi initially only once. Please refer to the below link to understand the app configuration process and follow the steps to finish the configuration successfully.
http://www.tp-link.com/us/faq-946.html // KASA app and TP-LINK Smart plug
Finding the IP address of your smart plug:
Now you have successfully connected your smart plug with your home wifi network via KASA app.
I hope my previous blog for making a low cost open smart home using openhab for beginners would have helped you all to begin your first smart home project with minimum investments,pls check it here if you have missed it
http://avenkat-iot.blogspot.com/2017/01/making-simple-open-smart-home-using.html
Today, In this blog I am going to show you how to develop a Simple but effective energy monitoring system(EMS) using a TP-LINK HS110 smart plug because TP-LINK brand has provided open API for their developers.So lets start developing our simple EMS..........:)
This project can be implemented in both your windows PC and even your cool Raspberry Pi.Here I have developed this system from my window's PC and you can also implement the same system in your raspberry pi too.
To begin this product, you need to buy a TP LINK HS110 smart plug which is available in the market at a price of $60(SGD).Presently this model is not available in India, but you can order online and can use it with a converter.

To begin our project, we should install Node.js in our PC first. Node.js is a modern Client-server Scripting language which is being widely used nowadays for developing several Internet of Things(IoT) applications.You can download and install Node.js in your windows PC or laptop from this website https://nodejs.org/en/download/
Following this we have to download the available API for our smart plug from Github. Click the below link and https://github.com/plasticrake/hs100-api , keep the HS110 API in htdocs folder of your PC(I have assumed that you have XAMPP(Apache and MySQL database) installed in your PC, If you didn't please click this link to download and install XAMPP https://www.apachefriends.org/download.html in your PC/laptop and follow the installation procedure to finish installation. Just run any php file from your localhost, to ensure XAMPP has been installed properly. Now we are all set to go for our EMS development process.
Initial Setup with KASA app:
Kasa is the application provided by TP LINK for this smart plug, which you can install in your android/ios mobile phones from play store/app store to setup your smart plug with your wifi initially only once. Please refer to the below link to understand the app configuration process and follow the steps to finish the configuration successfully.
http://www.tp-link.com/us/faq-946.html // KASA app and TP-LINK Smart plug
Finding the IP address of your smart plug:
Now you have successfully connected your smart plug with your home wifi network via KASA app.
To find the ip address of your smart plug.
step 1: Please login to your router first, By default most router manufacturers use 192.168.0.1 or 192.168.1.1 as the default LAN IP address. If you didnt find still, open cmd prompt and type 'ipconfig' to know the default gateway ip of your home router.
step 2: Look for DHCP client list inside the router settings page which you have logged in from the previous step. This lists out the name, ip address and mac-addresses of the devices connected to your wifi network. Note down the ip address of the smart plug having name as HS110. Using this ip address only, we are going to control and monitor our smart plug.
step 3: Now we are going to test our system form the downloaded API. Inside the api folder open the example/plug.js file and change the ip address to your smart plug IP address which we have noted down in our previous step
const plug = client.getPlug({host: '192.XXX.X.X '}); // replace with your ipaddress
Now, open the command prompt and navigate to C:\xampp\htdocs\....examples>, then run the plug.js file
C:\xampp\htdocs\....examples> node plug.js
this will result out all the information of the smart plug in a json format. If you have executed this file successfully it means,we have configured the smart plug correctly.
Insert Smart Plug data into MySQL:
Next, we need to store all the smart plug information in a MySQL database for our analysis purpose. Here we are going to create a separate json file called 'real.json' , which will hold only the real time latest value of the smart plug information. Then we are going to write a small php script to read this 'real.json' file and insert into database to access as our historical data. Let's go step by step to do this process
step 1: Since we are not going to use all the information of the smart plug, we can replace the code in the plug.js file to get the basic current,voltage and power value. Replace the code in the plug.js file with the below following code
new plug.js code
var myInt = setInterval(function(){
const Hs100Api = require('../../hs100-api-master');
const client = new Hs100Api.Client();
const plug = client.getPlug({host: '192.xxx.x.xx'}); // replace with your smart plug ip address
plug.getConsumption().then(data => {
var json = JSON.stringify(data,undefined,2);
var fs = require('fs');
fs.writeFile("real.json", json); // create a new real.json file for real time data
console.log('file created'); // Success!
})},10000); //update the real.json file every 10 sec ( you can also change it later)
step 2: Now, if you execute the "plug.js" file in the command prompt you will see a dialogue "file created" in the console. This means a new file has been created inside your api folder which you can access from the following url "C:\xampp\htdocs\....examples\real.json" .When you open your real.json file the value inside the file will look something like shown below
real.json
{
"current": 0.035634,
"voltage": 233.376908,
"power": 0,
"total": 0,
"err_code": 0
}
Step 3 : Now open the XAMPP control panel which we have installed already and start your Apache and MySQL Modules. The figure below shows the xampp control panel running the Apache and MySQL services.

Step 4 : To insert the value into MySQL database.We need to create a database schema and table first. To create this open your browser and enter into your phpmyadmin by typing this address "http://localhost/phpmyadmin/"
Now, execute the below sql commands to create database and table.
SQL commands to create database and table schema
CREATE DATABASE ems; // ems is for energy monitoring system
//inside this database create a table named emeter with following structure
CREATE TABLE IF NOT EXISTS `emeter` (
`datetime` datetime NOT NULL DEFAULT CURRENT_TIMESTAMP,
`current` float NOT NULL,
`voltage` float NOT NULL,
`power` float NOT NULL,
`total` float NOT NULL,
`err_code` int(10) NOT NULL
) ENGINE=InnoDB AUTO_INCREMENT=49 DEFAULT CHARSET=latin1;
step 5: Now lets write a small php code to capture this real.json file and insert into our MySQL database. Create a "emeter.php" file inside the same folder of your test files, then copy and paste the below code
emeter.php
<?php
$page = $_SERVER['PHP_SELF'];
$sec = "10";
//connect to mysql db
$con = mysql_connect("localhost","root","") or die('Could not connect: ' . mysql_error());
//connect to the employee database
mysql_select_db("ems", $con); // ems is your database name, pls change if u have another name
//read the json file contents
$jsondata = file_get_contents('emeter.json');
//convert json object to php associative array
$data = json_decode($jsondata, true);
//get the employee details
$current = $data['current'];
$voltage = $data['voltage'];
$power = $data['power'];
$total = $data['total'];
$err_code = $data['err_code'];
//insert into mysql table
$sql = "INSERT INTO emeter(current, voltage, power, total, err_code)
VALUES('$current', '$voltage', '$power', '$total', '$err_code')";
echo ('succssfully inserted');
if(!mysql_query($sql,$con))
{
die('Error : ' . mysql_error());
}
?>
<html>
<head>
<meta http-equiv="refresh" content="<?php echo $sec?>;URL='<?php echo $page?>'">
</head>
</html>
if you have a php version 5.5 and above, the above mysql extension may not work so in that case you have to replace your mysql by mysqli, please copy and paste the below code to work with newer php versions
emeter.php for php version 5.5 and above
<?php
$page = $_SERVER['PHP_SELF'];
$sec = "10";
//connect to mysql db
$username = "root";
$password = "";
$host = "localhost";
$database="db";
$server = mysqli_connect($host, $username, $password);
$connection = mysqli_select_db($server,$database);
//read the json file contents
$jsondata = file_get_contents('emeter.json');
//convert json object to php associative array
$data = json_decode($jsondata, true);
//get the employee details
$current = $data['current'];
$voltage = $data['voltage'];
$power = $data['power'];
$total = $data['total'];
$err_code = $data['err_code'];
//insert into mysql table
$sql = "INSERT INTO emeter(current, voltage, power, total, err_code)
VALUES('$current', '$voltage', '$power', '$total', '$err_code')";
echo ('succssfully inserted');
$query = mysqli_query($server,$sql);
if ( ! $query ) {
echo mysqli_error();
die;
}
mysqli_close($server);
?>
<html>
<head>
<meta http-equiv="refresh" content="<?php echo $sec?>;URL='<?php echo $page?>'">
</head>
</html>
Here I have used the auto refresh function to execute this query every 10 secs in order to make it simple . You can use ajax or timer function to refresh the page without reloading the entire page....:)
Now open your browser and run our emeter.php file from the url
"http://localhost/.../examples/emeter.php"
Now if you open the database you can see your power consumption and all the values inserted inside.

Note: To execute the system in real time you need to run both the plug.js and emeter.php
plug.js //keep on updating the values in the json file
emeter.php // keeps on inserting into database
Now you can, pass this database values to any graph or chart for Monitoring,analysis and visualization like this

Note : Kindly run the plug.js and emeter.php file as a cron job when you are developing this project using raspberry pi, This will start inserting the data into database once your Pi is turned on
Hope this blog will help you all to understand the use of API and the need of a energy monitoring system for your IoT projects....!!
step 3: Now we are going to test our system form the downloaded API. Inside the api folder open the example/plug.js file and change the ip address to your smart plug IP address which we have noted down in our previous step
const plug = client.getPlug({host: '192.XXX.X.X '}); // replace with your ipaddress
Now, open the command prompt and navigate to C:\xampp\htdocs\....examples>, then run the plug.js file
C:\xampp\htdocs\....examples> node plug.js
Insert Smart Plug data into MySQL:
Next, we need to store all the smart plug information in a MySQL database for our analysis purpose. Here we are going to create a separate json file called 'real.json' , which will hold only the real time latest value of the smart plug information. Then we are going to write a small php script to read this 'real.json' file and insert into database to access as our historical data. Let's go step by step to do this process
step 1: Since we are not going to use all the information of the smart plug, we can replace the code in the plug.js file to get the basic current,voltage and power value. Replace the code in the plug.js file with the below following code
new plug.js code
var myInt = setInterval(function(){
const Hs100Api = require('../../hs100-api-master');
const client = new Hs100Api.Client();
const plug = client.getPlug({host: '192.xxx.x.xx'}); // replace with your smart plug ip address
plug.getConsumption().then(data => {
var json = JSON.stringify(data,undefined,2);
var fs = require('fs');
fs.writeFile("real.json", json); // create a new real.json file for real time data
console.log('file created'); // Success!
})},10000); //update the real.json file every 10 sec ( you can also change it later)
step 2: Now, if you execute the "plug.js" file in the command prompt you will see a dialogue "file created" in the console. This means a new file has been created inside your api folder which you can access from the following url "C:\xampp\htdocs\....examples\real.json" .When you open your real.json file the value inside the file will look something like shown below
real.json
{
"current": 0.035634,
"voltage": 233.376908,
"power": 0,
"total": 0,
"err_code": 0
}
Step 3 : Now open the XAMPP control panel which we have installed already and start your Apache and MySQL Modules. The figure below shows the xampp control panel running the Apache and MySQL services.

Now, execute the below sql commands to create database and table.
SQL commands to create database and table schema
CREATE DATABASE ems; // ems is for energy monitoring system
//inside this database create a table named emeter with following structure
CREATE TABLE IF NOT EXISTS `emeter` (
`datetime` datetime NOT NULL DEFAULT CURRENT_TIMESTAMP,
`current` float NOT NULL,
`voltage` float NOT NULL,
`power` float NOT NULL,
`total` float NOT NULL,
`err_code` int(10) NOT NULL
) ENGINE=InnoDB AUTO_INCREMENT=49 DEFAULT CHARSET=latin1;
step 5: Now lets write a small php code to capture this real.json file and insert into our MySQL database. Create a "emeter.php" file inside the same folder of your test files, then copy and paste the below code
emeter.php
<?php
$page = $_SERVER['PHP_SELF'];
$sec = "10";
//connect to mysql db
$con = mysql_connect("localhost","root","") or die('Could not connect: ' . mysql_error());
//connect to the employee database
mysql_select_db("ems", $con); // ems is your database name, pls change if u have another name
//read the json file contents
$jsondata = file_get_contents('emeter.json');
//convert json object to php associative array
$data = json_decode($jsondata, true);
//get the employee details
$current = $data['current'];
$voltage = $data['voltage'];
$power = $data['power'];
$total = $data['total'];
$err_code = $data['err_code'];
//insert into mysql table
$sql = "INSERT INTO emeter(current, voltage, power, total, err_code)
VALUES('$current', '$voltage', '$power', '$total', '$err_code')";
echo ('succssfully inserted');
if(!mysql_query($sql,$con))
{
die('Error : ' . mysql_error());
}
?>
<html>
<head>
<meta http-equiv="refresh" content="<?php echo $sec?>;URL='<?php echo $page?>'">
</head>
</html>
if you have a php version 5.5 and above, the above mysql extension may not work so in that case you have to replace your mysql by mysqli, please copy and paste the below code to work with newer php versions
emeter.php for php version 5.5 and above
<?php
$page = $_SERVER['PHP_SELF'];
$sec = "10";
//connect to mysql db
$username = "root";
$password = "";
$host = "localhost";
$database="db";
$server = mysqli_connect($host, $username, $password);
$connection = mysqli_select_db($server,$database);
//read the json file contents
$jsondata = file_get_contents('emeter.json');
//convert json object to php associative array
$data = json_decode($jsondata, true);
//get the employee details
$current = $data['current'];
$voltage = $data['voltage'];
$power = $data['power'];
$total = $data['total'];
$err_code = $data['err_code'];
//insert into mysql table
$sql = "INSERT INTO emeter(current, voltage, power, total, err_code)
VALUES('$current', '$voltage', '$power', '$total', '$err_code')";
echo ('succssfully inserted');
$query = mysqli_query($server,$sql);
if ( ! $query ) {
echo mysqli_error();
die;
}
mysqli_close($server);
?>
<html>
<head>
<meta http-equiv="refresh" content="<?php echo $sec?>;URL='<?php echo $page?>'">
</head>
</html>
Here I have used the auto refresh function to execute this query every 10 secs in order to make it simple . You can use ajax or timer function to refresh the page without reloading the entire page....:)
Now open your browser and run our emeter.php file from the url
"http://localhost/.../examples/emeter.php"
Now if you open the database you can see your power consumption and all the values inserted inside.

Note: To execute the system in real time you need to run both the plug.js and emeter.php
plug.js //keep on updating the values in the json file
emeter.php // keeps on inserting into database
Now you can, pass this database values to any graph or chart for Monitoring,analysis and visualization like this

Note : Kindly run the plug.js and emeter.php file as a cron job when you are developing this project using raspberry pi, This will start inserting the data into database once your Pi is turned on
Hello, i wanted to ask what if we have several HS110 plugs. Then how would we implement it?
ReplyDeleteHi Saket, kindly specify ip addresses of each plug like below
Deleteconst plug1 = client.getPlug({host: '192.168.1.84'});
const plug2 = client.getPlug({host: '192.168.0.85'});
const plug3 = client.getPlug({host: '192.168.0.86'});
and define each plug as a separate function to control it individually or else as whole. I recommend you to use express.js to control and monitor the plugs from a web application.
Hello Venkat,
ReplyDeleteThank you for this blog ! However can you provide some pointers on the graphs part too. Like how the values stored in the DB can be used for further processing. Any sort of help is highly appreciated.
Thank you !
Great info. Thanks for sharing.
ReplyDeleteWifi Smart Plug
Looking for D-link Support call on 1800987893 , visit on:
ReplyDeleteD-link Support